Module Aim
Staff are able to use the iPad’s camera to take photos and screenshots and edit them if necessary.
Taking Photos on the iPad
To take photos on the iPad click on the camera icon.
When you open the camera you will be presented with the following screen:
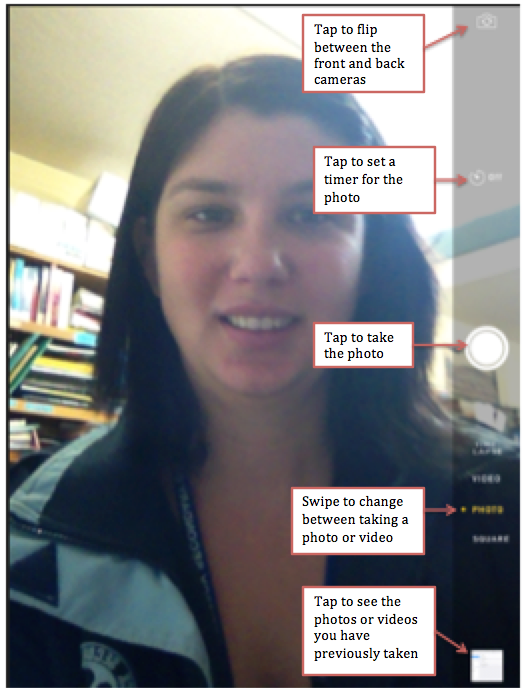
Angle your iPad and take your picture by hitting the big white button.
To see the photo you have taken click on the square in the bottom right corner.
Editing Photos on the iPad
Open the picture you would like to edit by either clicking on the square at the bottom right corner of the camera screen or from the homepage by clicking on the Photos app
Select the picture you want to edit then click the “Edit button”
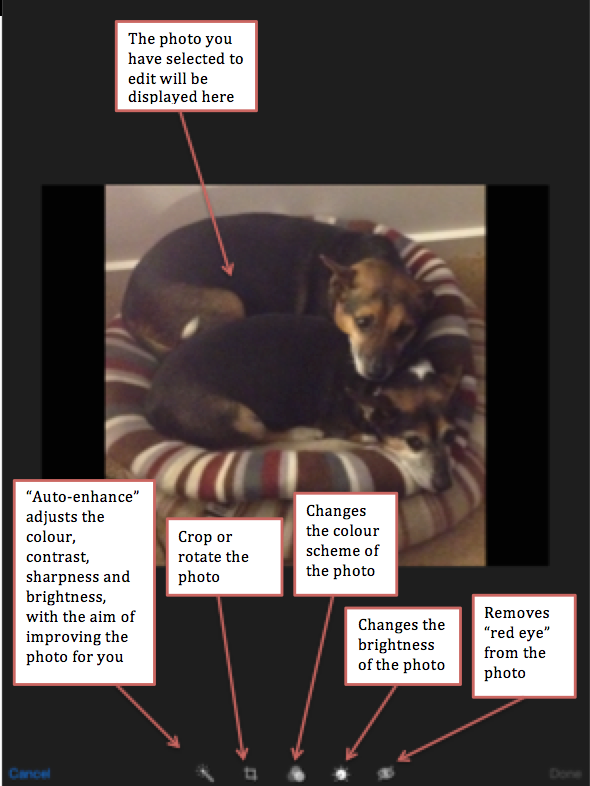
Once you had edited you click Done to finish.
Taking a screen shot
To take a screen shot simultaneously press the home button and the lock button.

You will probably need to use two hands to coordinate the button presses. If you have trouble, try this:
- Press and hold the lock/power button (the switch on the top edge of the device).
- While the lock button is held down, press the menu button (the main button below the screen).
The screen shot will automatically be saved to your photos.
Demonstrate Competency
To demonstrate competency staff must submit an edited screen shot to Edmodo.