Google Drive is just one of the apps that you can access with your Berwick College Google account. You can access these apps on any device at any time and bring students and teachers together to collaborate in real time. This PD focuses on the aspects of Google Drive that can be utilised in an iPad classroom, however there are a range of other tasks you can accomplish quickly and easily within the Google Apps for Education digital infrastructure on your computer.
Google Drive is the ‘file storage’ app on the iPad. It collects all types of files and brings them together in an easily searchable app. Whenever you open a type of file in the Drive iPad app it will actually open in one of three apps so that you can edit them: Google Docs (like Word), Google Slides (like Powerpoint) and Google Sheets (like Excel).
Step 1: Using Google Docs
1.1 Open up Google Docs and click on the  in the bottom right hand corner of the app.
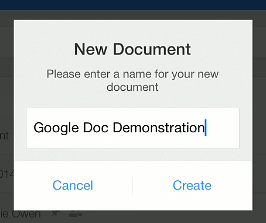
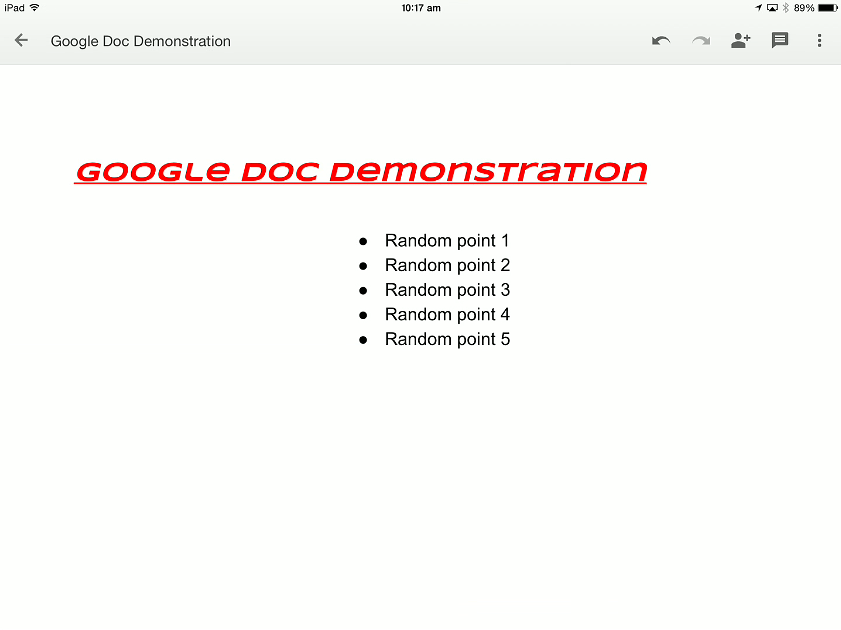
1.2 Name the document Google Doc Demonstration and click ‘create’
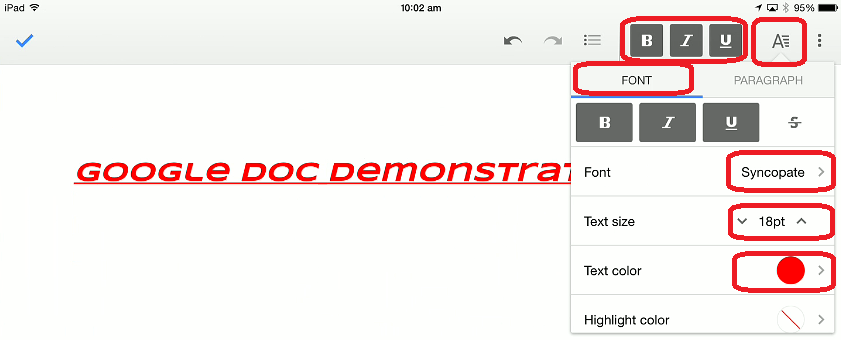
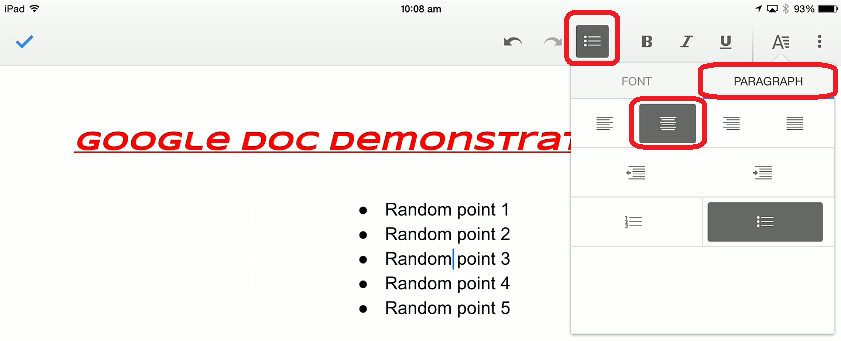
1.3 Using the tools in the top right corner of the screen edit your document with the following:
-
A heading called ‘Google Doc Demonstration’ with a font size of 18, font of Syncopate, font colour red, with Bold, Italics and Underline turned on
-
Create a bullet point list with 5 points in black, Arial, size 12 font (no bold, italics or underline), and centre the list
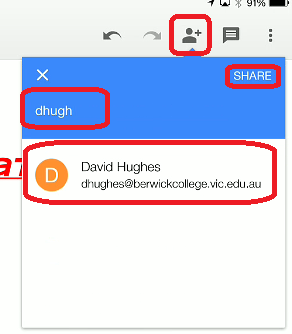
1.4 Click on the person with the + in the top right of the screen, type in dhughes@berwickcollege.vic.edu.au and click on ‘SHARE’
1.5 Take a screen shot of the document (hold down the circle button under the screen and then press the power button quickly) and store in your camera roll for later.
Step 2: Using Google Sheets
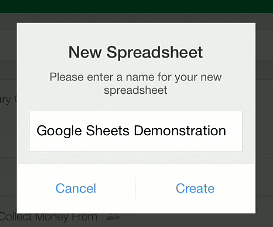
2.1 Open up Google Sheets on your iPad, click the  in the bottom right corner, name the Spreadsheet Google Sheets Demonstration and click ‘create’
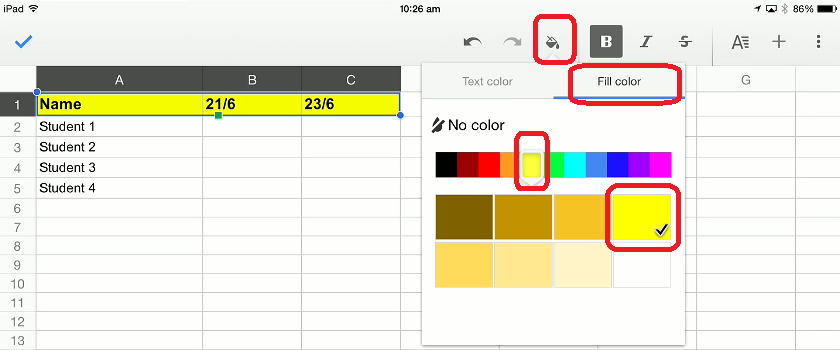
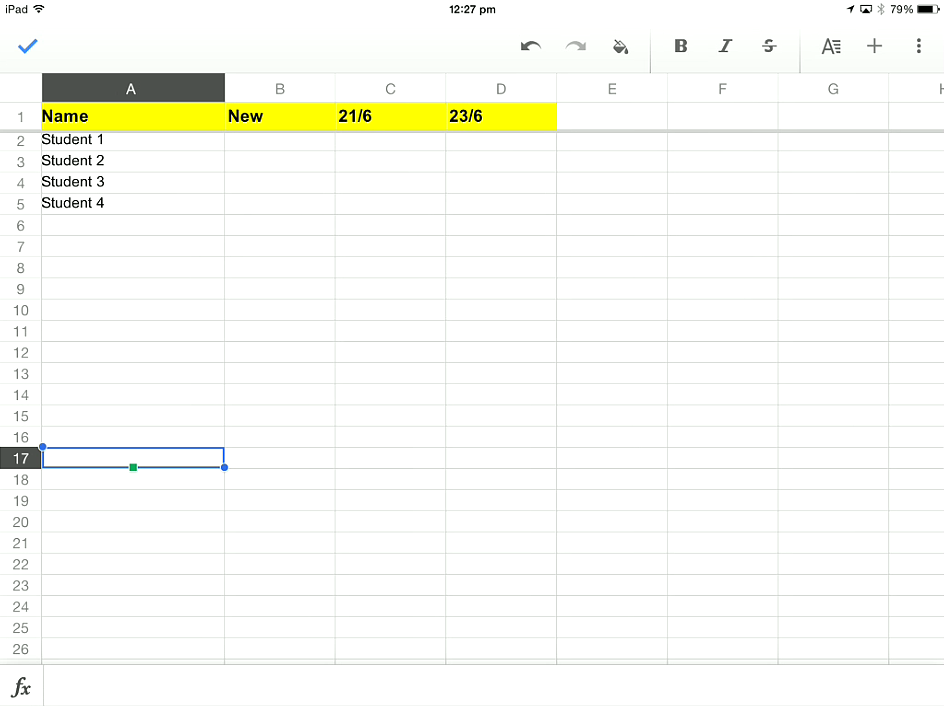
2.2 Enter in some random sample data for a roll list, make the first row ‘Bold’ and font size 14, make the student name column font size 12, and then fill the top row with a yellow fill colour
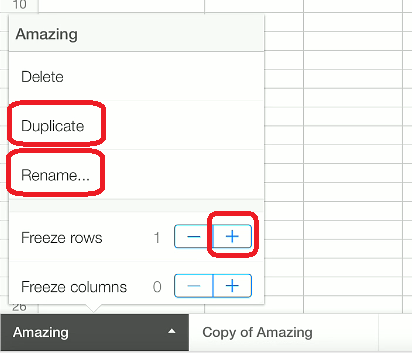
2.3 Press ‘Sheet1′ at the bottom left of the screen, and freeze row 1, rename Sheet1 and Duplicate the sheet:
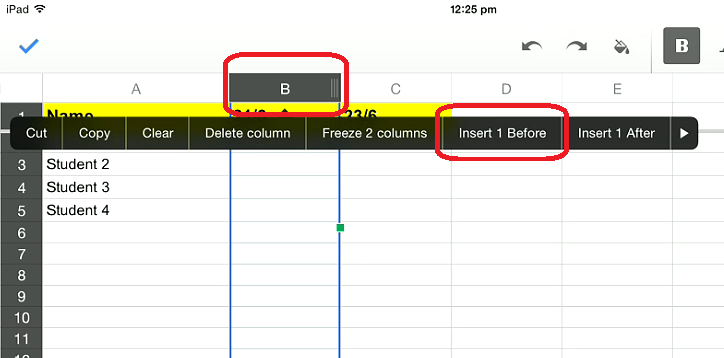
2.4 Press the ‘Column B’ and select ‘Insert 1 Before’ and call this new column ‘New’
2.5 Take a screenshot of your sheet and save it in your camera roll for use later.
Step 3: Using Google Slides
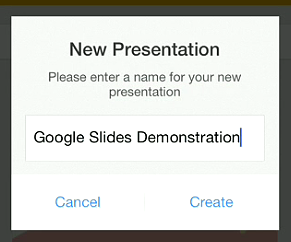
3.1 Open up the Google Slides app and touch the  icon in the bottom right hand corner. Call this New Presentation ‘Google Slides Demonstration’ and click ‘Create’.
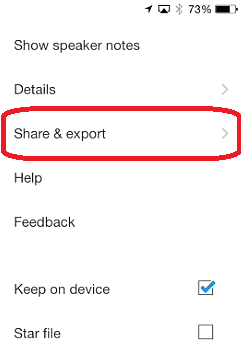
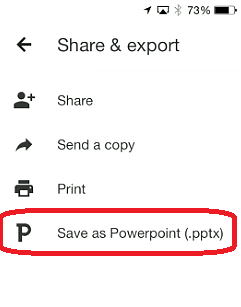
3.2 Press the three dots  , press on ‘Share & export’ and press ‘Save as Powerpoint (.pptx)’
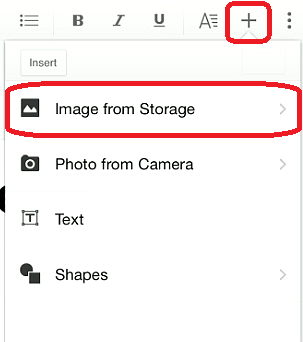
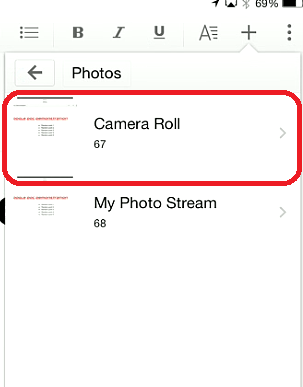
3.3 Press the ‘+’ icon in the top right of the screen, select ‘Image from Storage’, select ‘Camera Roll’ and select the two screenshots you took in previous steps of your Sheet (Google Sheet Demonstration sheet) and Docs (Google Docs Demonstration doc).
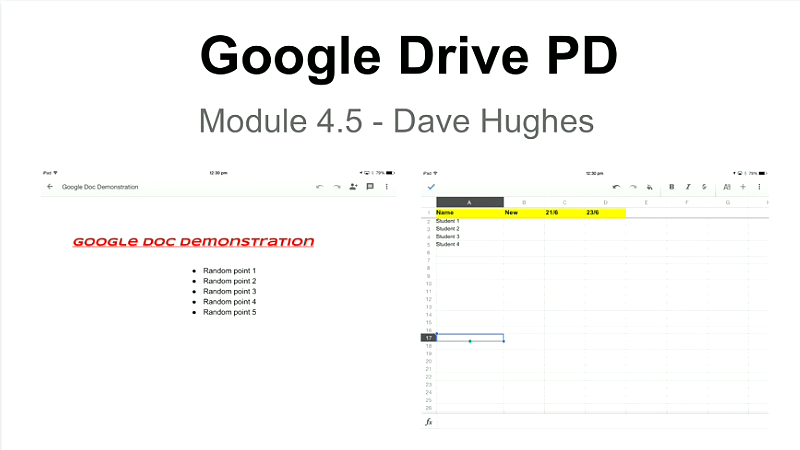
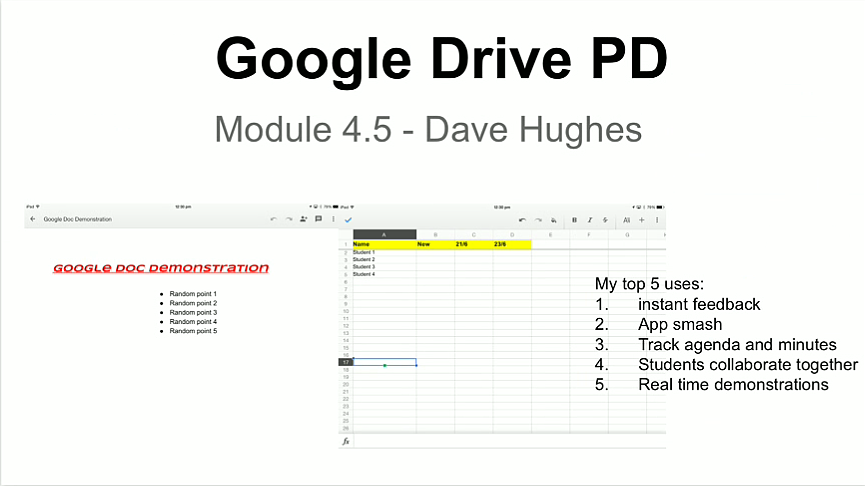
3.4 Change the Title of the slide to ‘Google Drive PD’, the sub-title to ‘Module 4.5 – First & Last Name’ and layout the screenshots like the shot below:
Step 4: Daily Teaching Routine Tasks
Using Google Drive’s functionality to create online documents, slides or sheets, teachers can do all kinds of tasks that are part of the daily teaching routine:
- Create and share lesson plans with teachers and students
- Create and share information and activity sheets
- Share images, videos and audio with students
- Give instant and timely feedback to students through comments and editing of work whilst they are working on it
- Monitor student progress live from your own device
- Have students collaborate together on a project from their own devices
- Keep tracking of staff meeting agendas and minutes
- App smash with other apps to do innovative learning tasks for students
- Create shared folders and have students submit work directly to you through Drive
- Connect Drive to Edmodo to distribute and collect information and work from students
There are, of course hundreds of other ways you could use Google Drive in the classroom. Have a read of this: 100 Ways to Use Google Drive in the classroom.
And go check out the Maximising Google Drive on the iPad course in iTunesU by clicking here.
Also, check out this slideshow presenting 32 Ways to Use Google Apps in the Classroom.
After checking out the different ways for using Google Drive in the classroom and brainstorming for yourself how you could use Google Drive, on the slide you created in Step 3 list 5 ways that you could use Google Drive in your classroom in order of the likelihood that you might actually make use of.
Demonstrate Competency
Submit your screenshot of your slide/powerpoint in Google slides with: 1) title and sub-title, 2) two images – one of the doc you created and the other of the sheet you created, and 3) your top 5 list of ways you could use Google Drive in the clsasroom.